Feature
- Guideline validation for X12 944 (Warehouse Stock Transfer Receipt Advice)
Feature
Bug Fixes
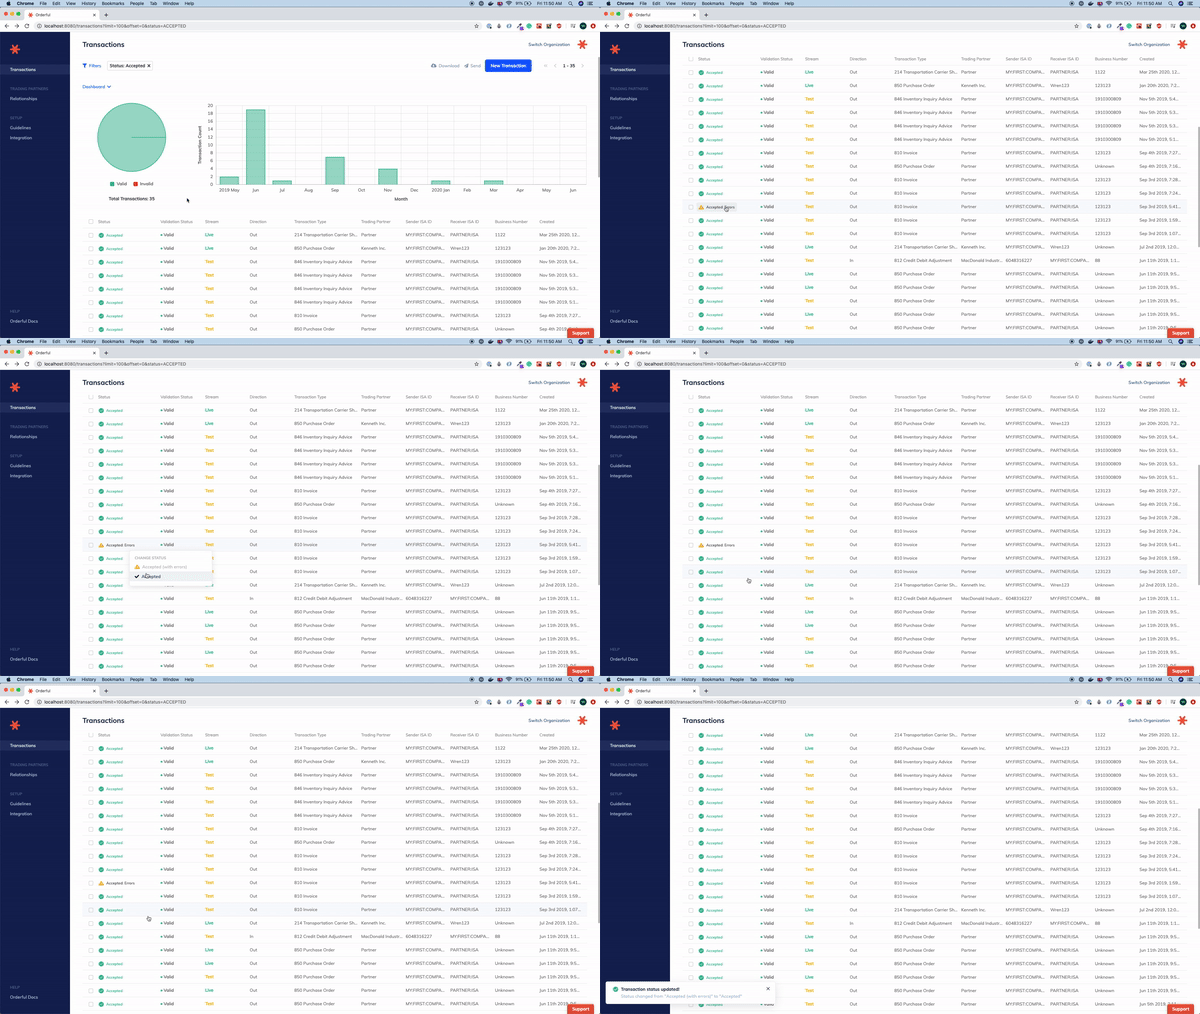
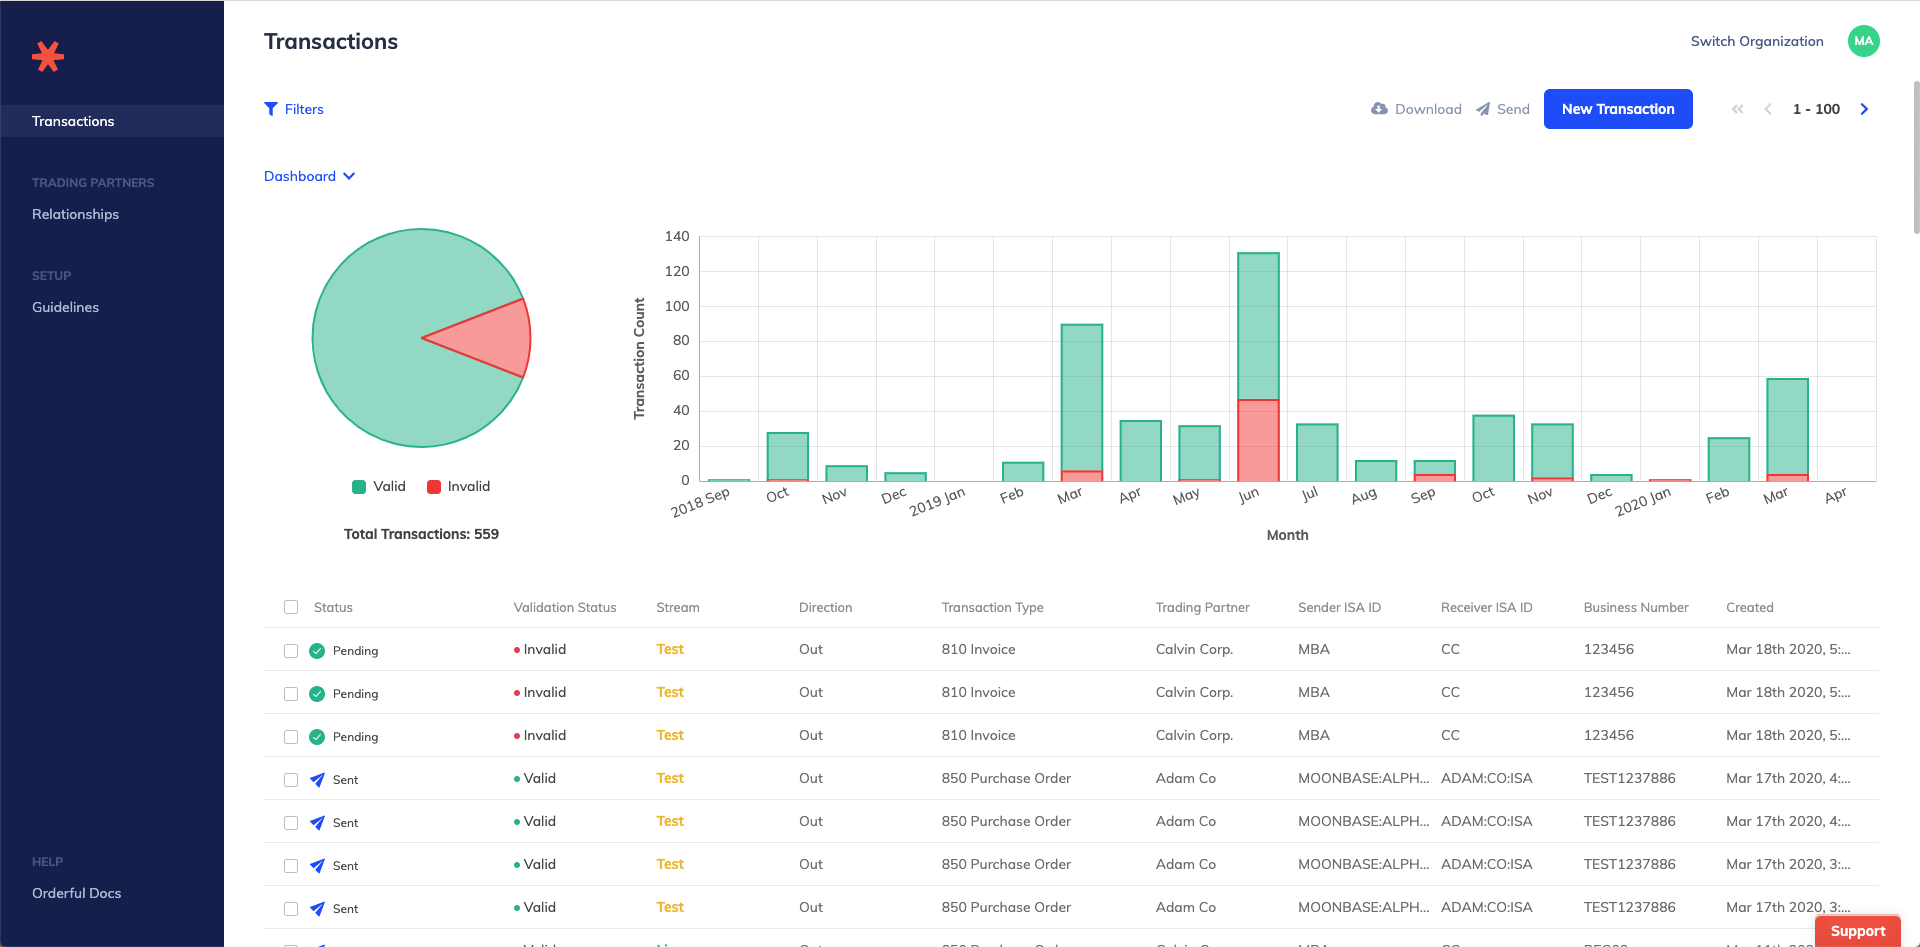
We're excited to announce some big changes to our UI today, a reskin with a side-panel navigation!

If you would like to provide us with feedback, please send your comments on the new UI reskin to[email protected].
The new navigation features Orderful's deep blue, and has all core business objects located on a side-panel, vertical navigation.
The vertical navigation allows us to help drive more left-to-right flows in the application for core user behaviors: Testing, and Transaction Issue Resolution, for example.
Over the next few months, we will continue to add new features to the new navigation and you will see the app continue to change for the better! We are excited to ship these changes for you.
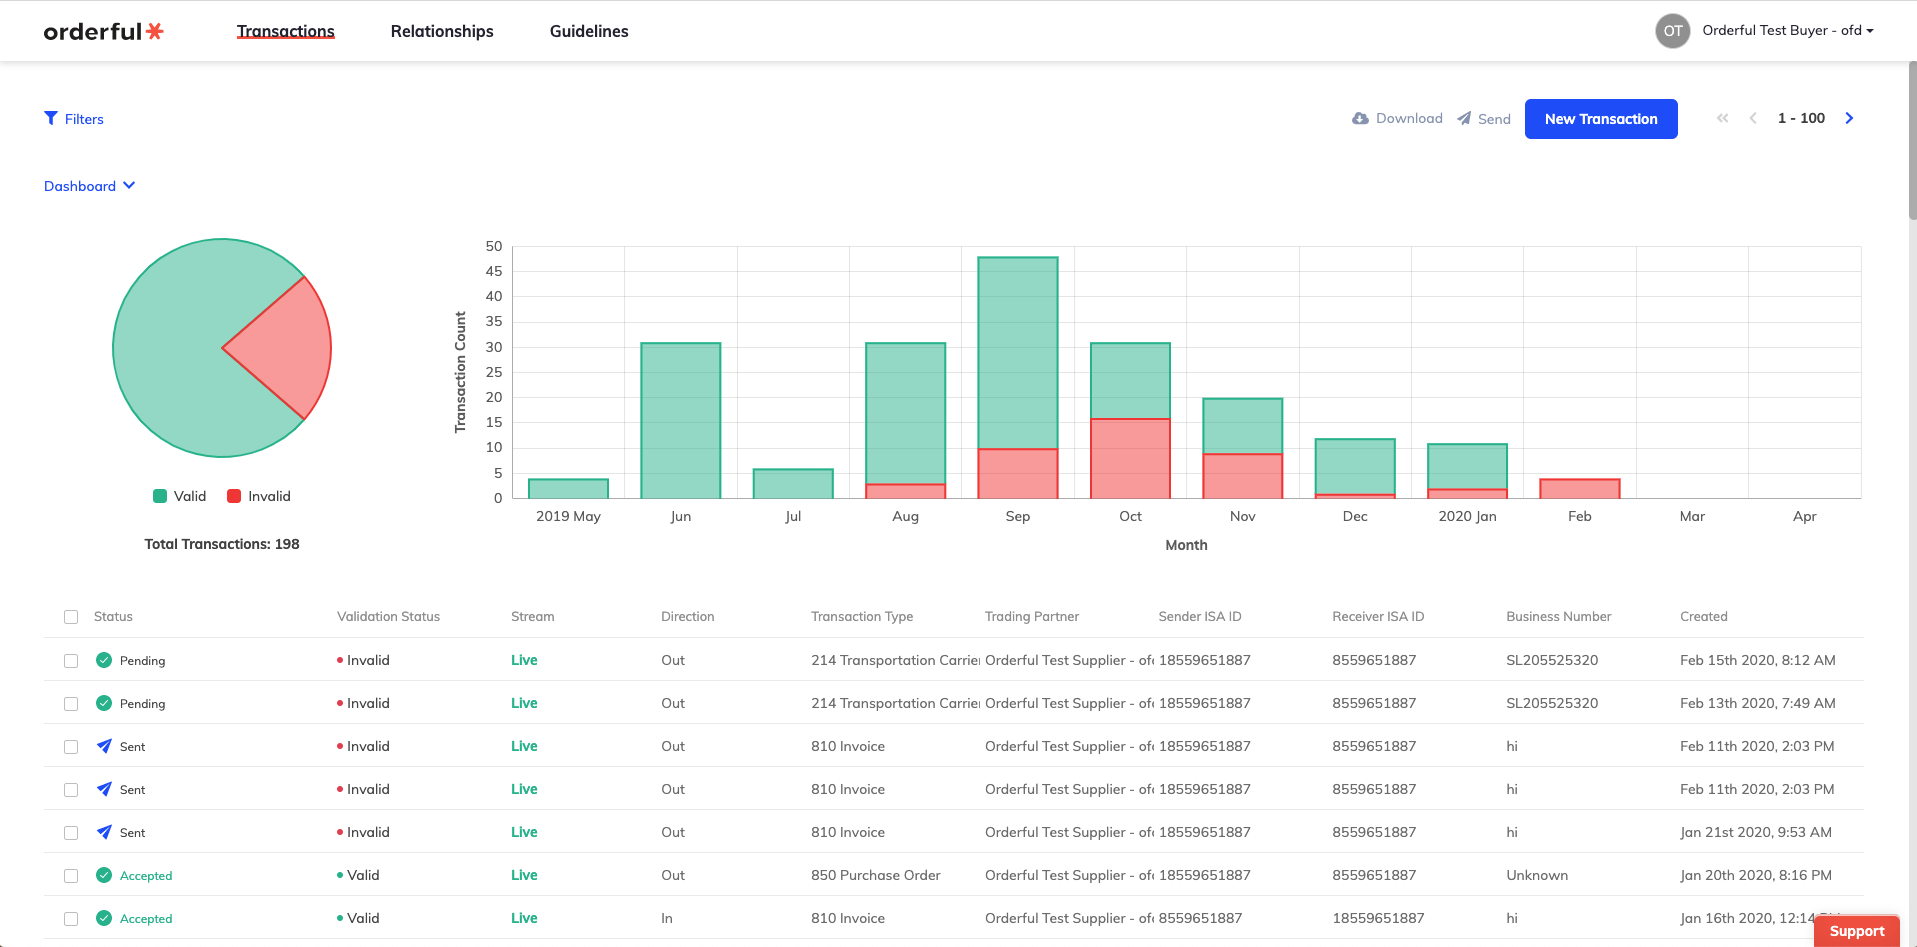
Our old navigation was horizontal across the top of the page. It limited us quite a bit in terms of helping drive a flow in the application for users to process and do work from Left to Right.
Again, if you would like to provide us with feedback, please send your comments on the new UI reskin to[email protected].
We're excited to announce a new feature today – the ability to add your custom HTTP destinations to send transactions to.
Once you've created a custom HTTP destination, you can now assign it to your organization. If assigned, it will be the default setting for all of your relationships, unless, at the relationship level, a destination is set.
You can create custom destinations and their auth settings on the /settings/integrations page
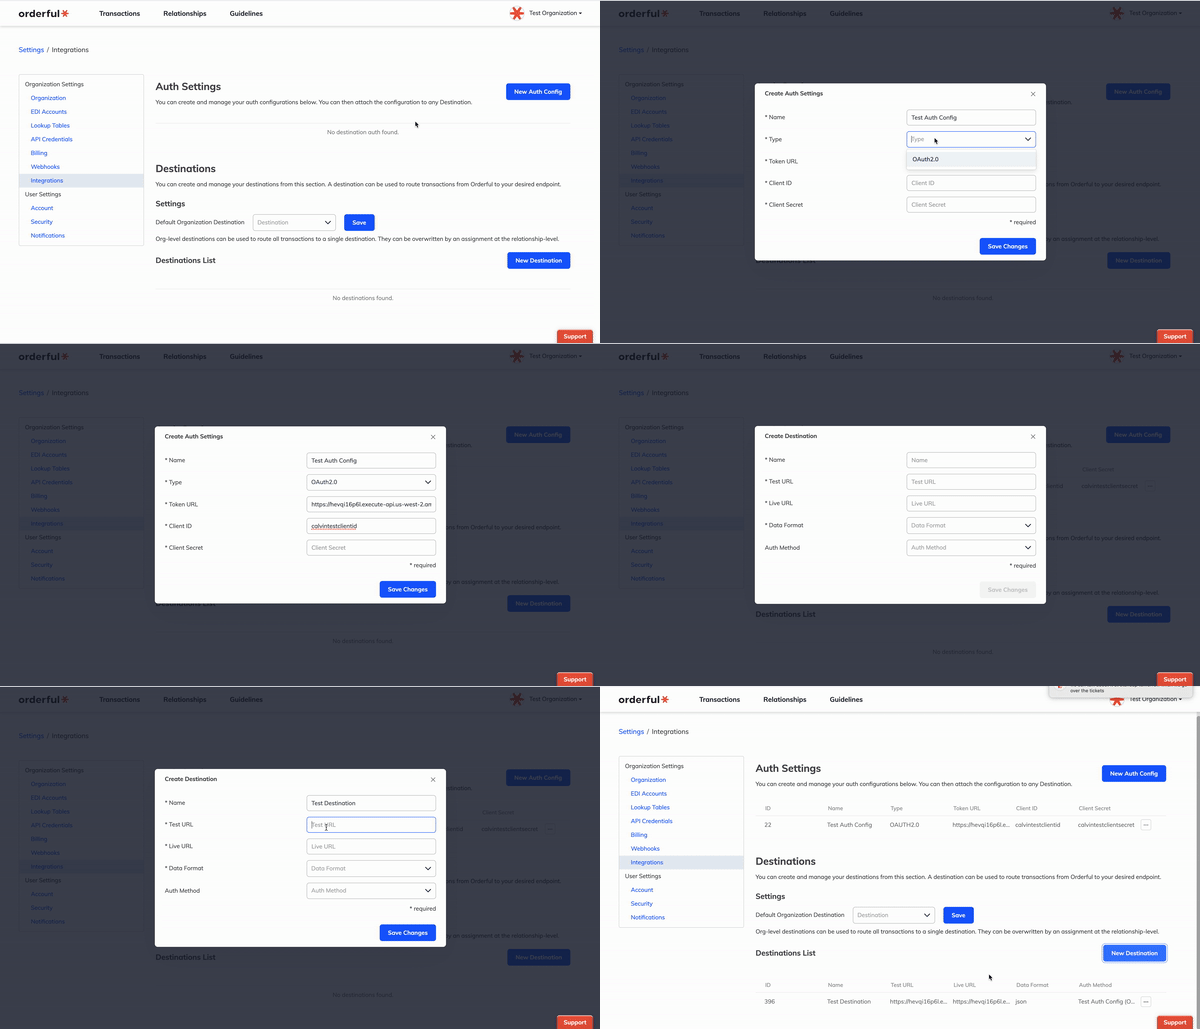
If you would like to add a destination to a relationship, you can do so on the relationships page.
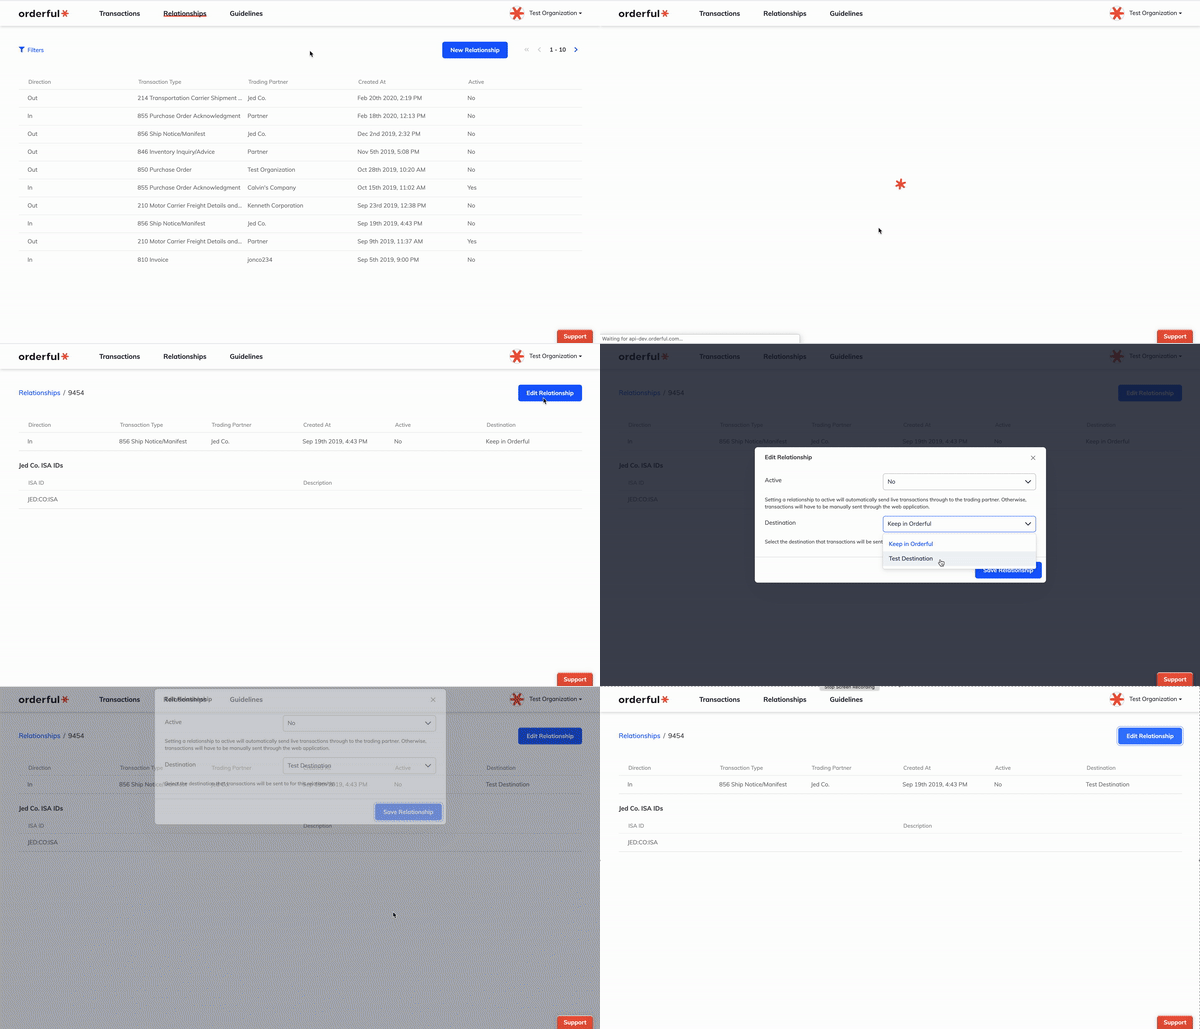
You can read more about destinations here
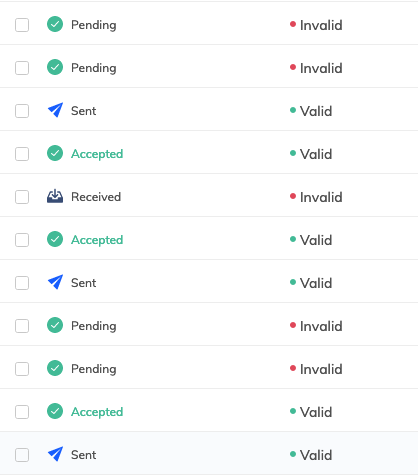
There are two types of statuses now: transaction status and validation status. New icons have been added as well to better distinguish between the two status types. This change also includes detailed filtering for the two status types.
For more information, please visit our guide for details.
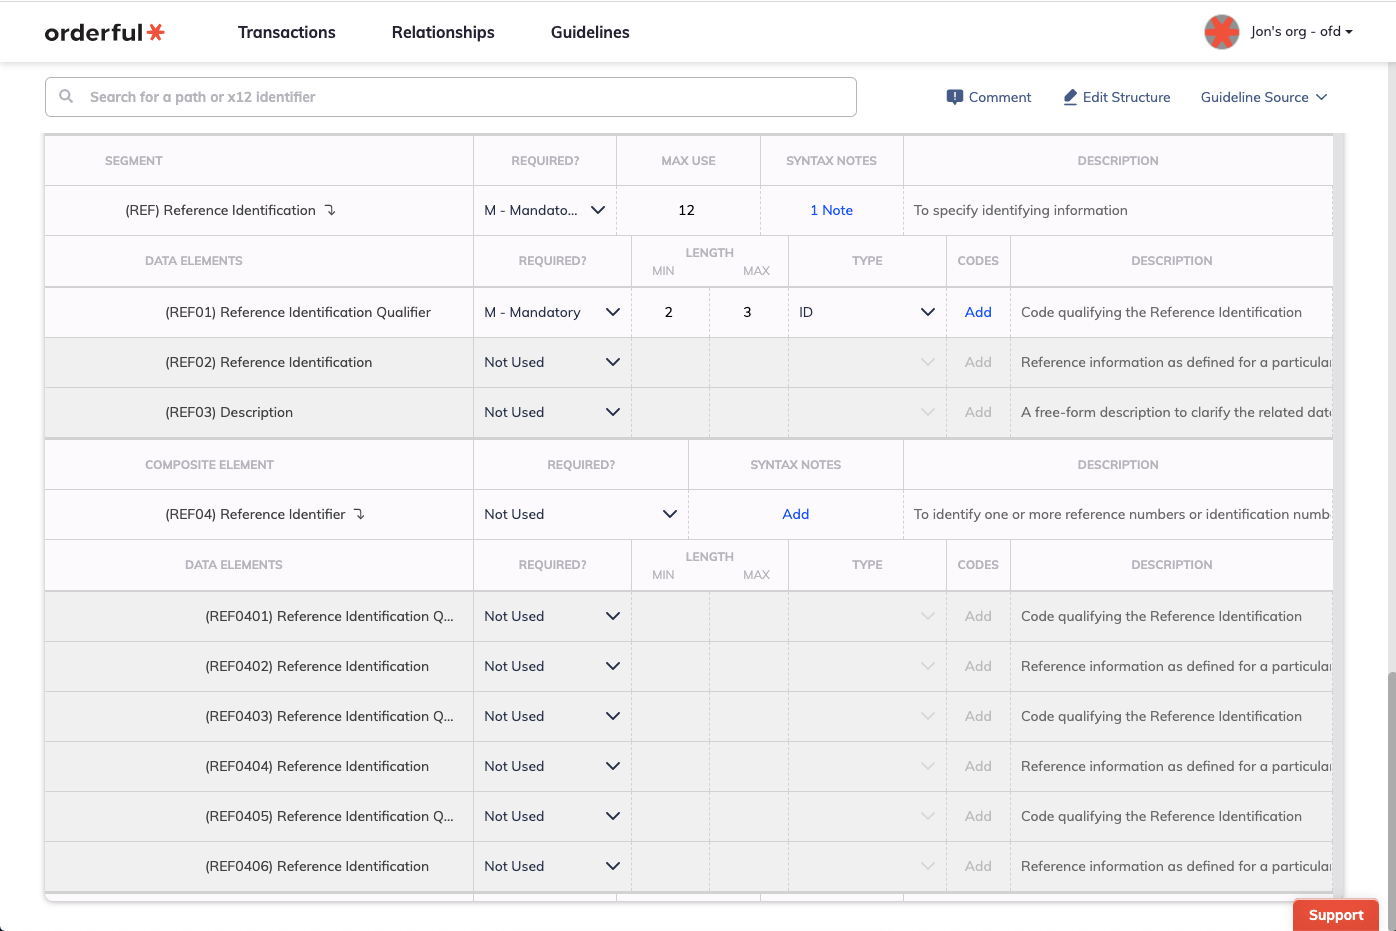
Today we've improved our Guidelines feature to provide full support for X12 composite elements.
While our users have always had the ability to write guidelines on component elements – the simple data elements making up an X12 composite element – until now, the requirements of that parent composite element couldn't be specified.
As of today, you'll see a separate entry in the Guidelines builder for composite elements, allowing you to indicate whether or not a composite element is mandatory, as well as write syntax notes on that composite element indicating which of its component elements have relational conditions between them.
Formerly, if you marked a component element as 'mandatory', a transaction would always fail validation if that component element wasn't present. Now, that transaction will still fail validation, but only if the parent composite element is also mandatory, or other component elements are present. Said another way – if a composite element is optional, a missing mandatory component element will only cause a validation error if at least some portion of that composite element is being sent.
We've been careful to make this change in a way that ensures that your existing guidelines will still be evaluated in exactly the same way that they always have been. If you'd like to take advantage of the new functionality with your existing guidelines, you can do so simply by copying your published guideline to a new draft, making the needed changes, and then publishing the new version.
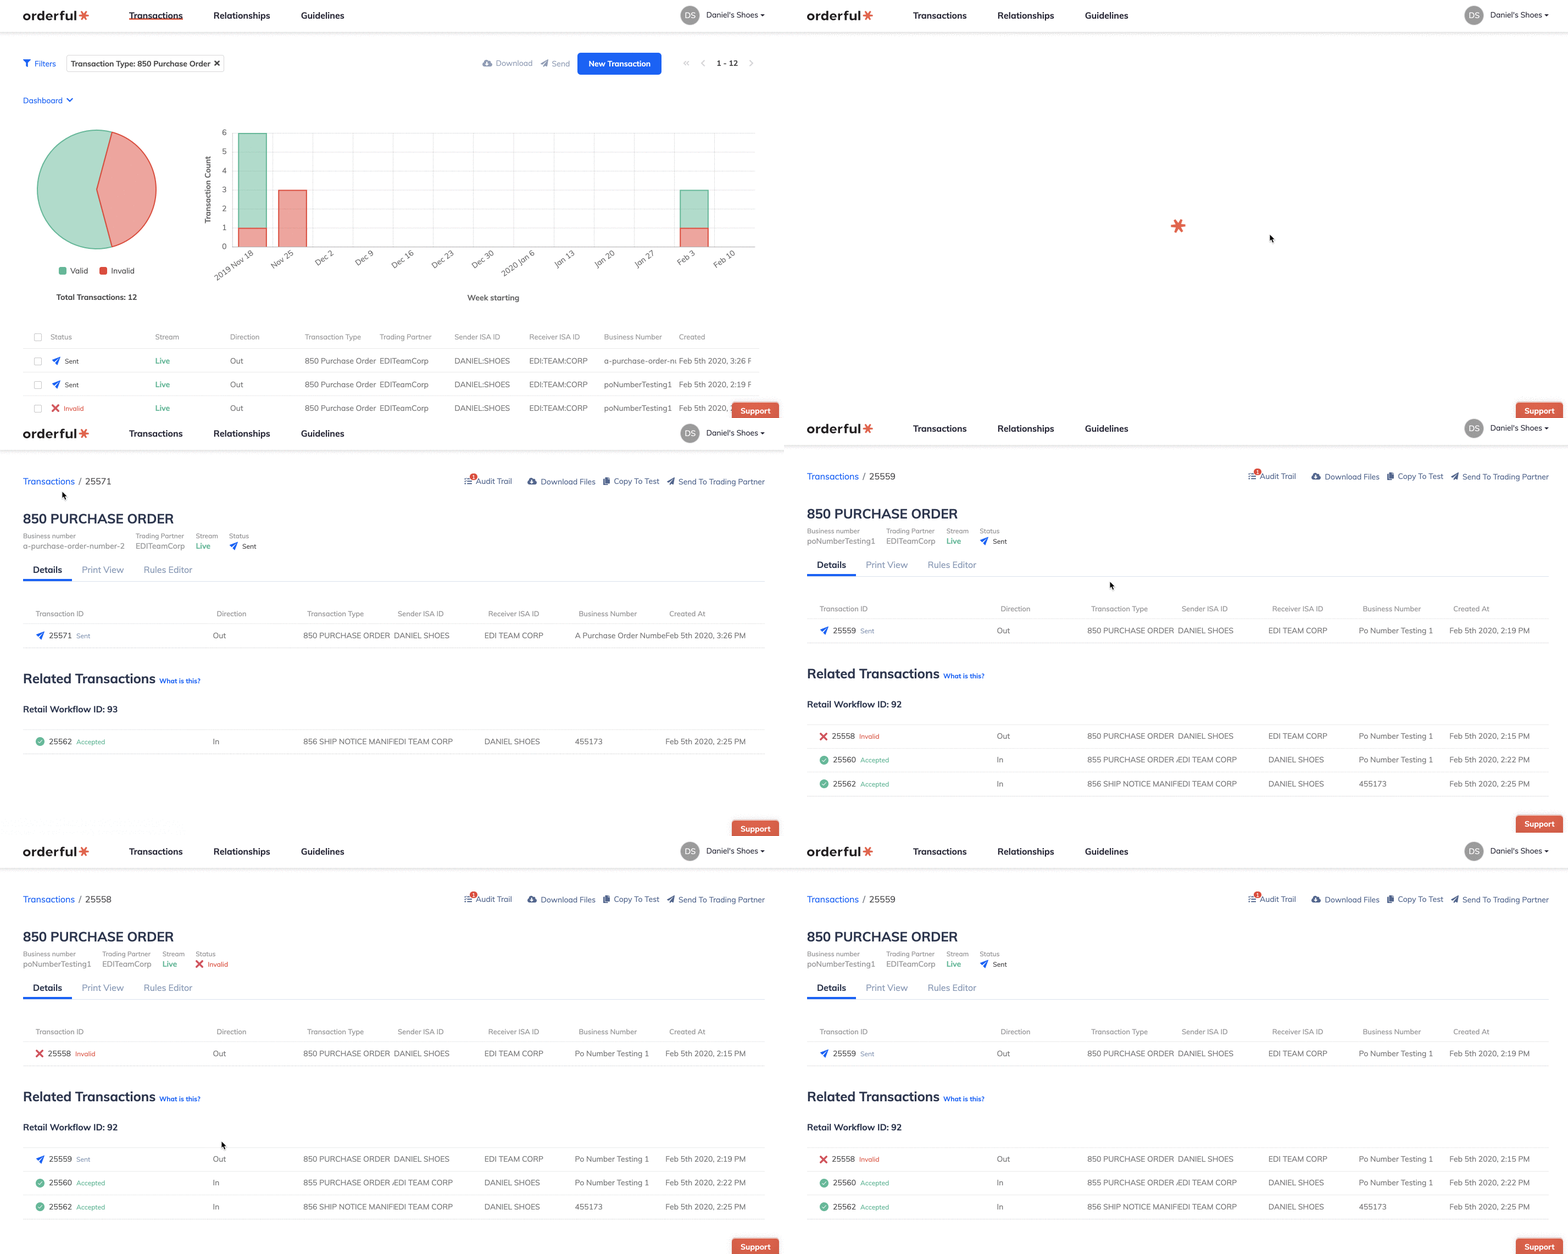
We're excited to announce a new feature today – the ability to track and visualize sequences of transactions that belong together in a business process.
Groups of related transactions are automatically created and maintained as transactions are processed by Orderful. As a first step, we've added the Retail Workflow, which groups transactions of the following types by their associated Purchase Order number:
When you click on a transaction in the Retail Workflow, our updated Transaction Details page will now show you all of its related transactions from that workflow:
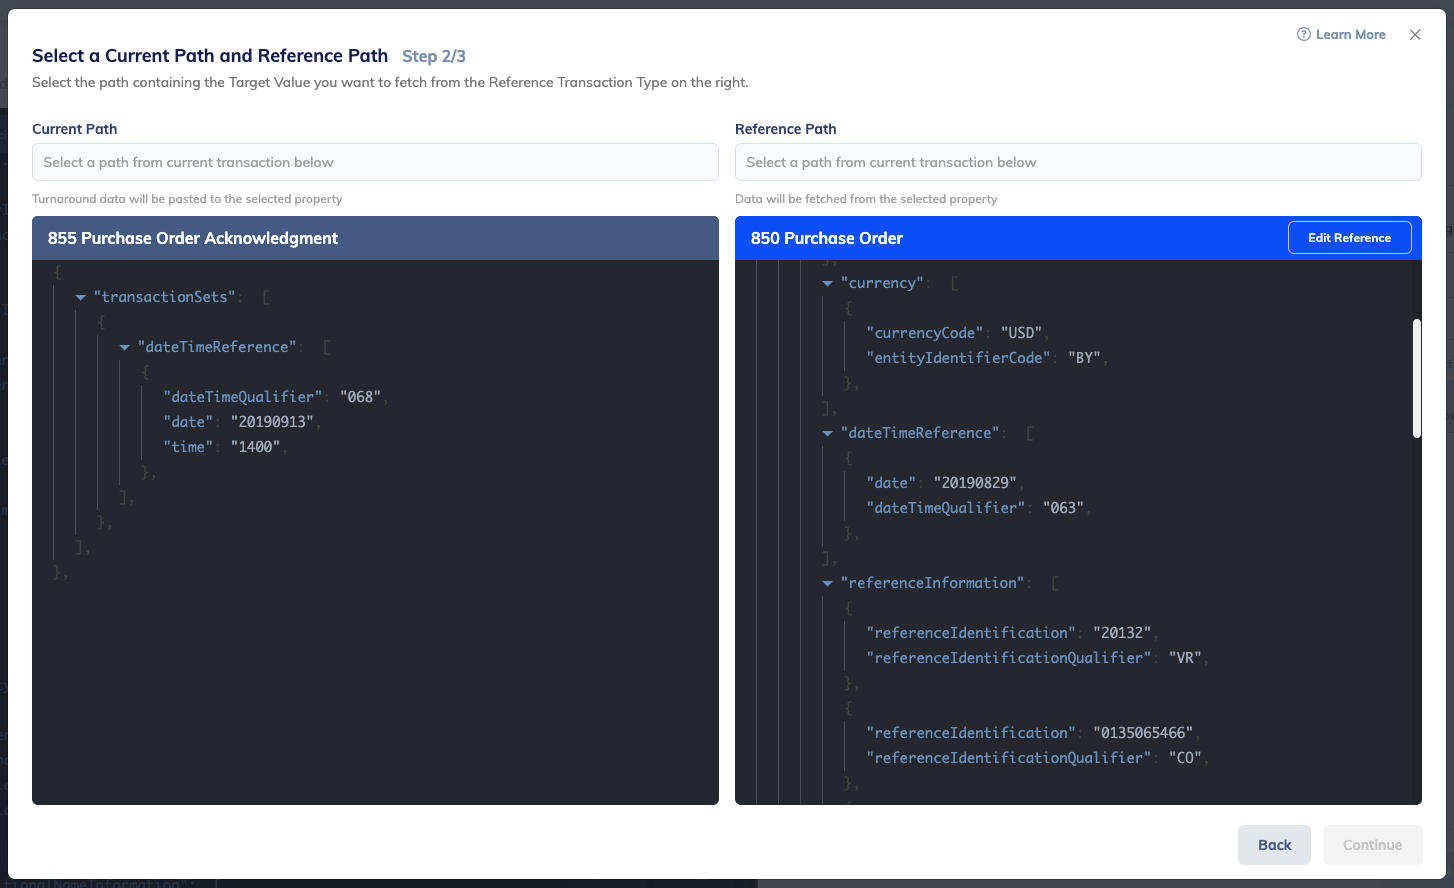
Filter settings on Transactions, Relationships, and Guidelines are now automatically persisted and restored locally. You can now use other Orderful features knowing that your filters will still be there when you're back.
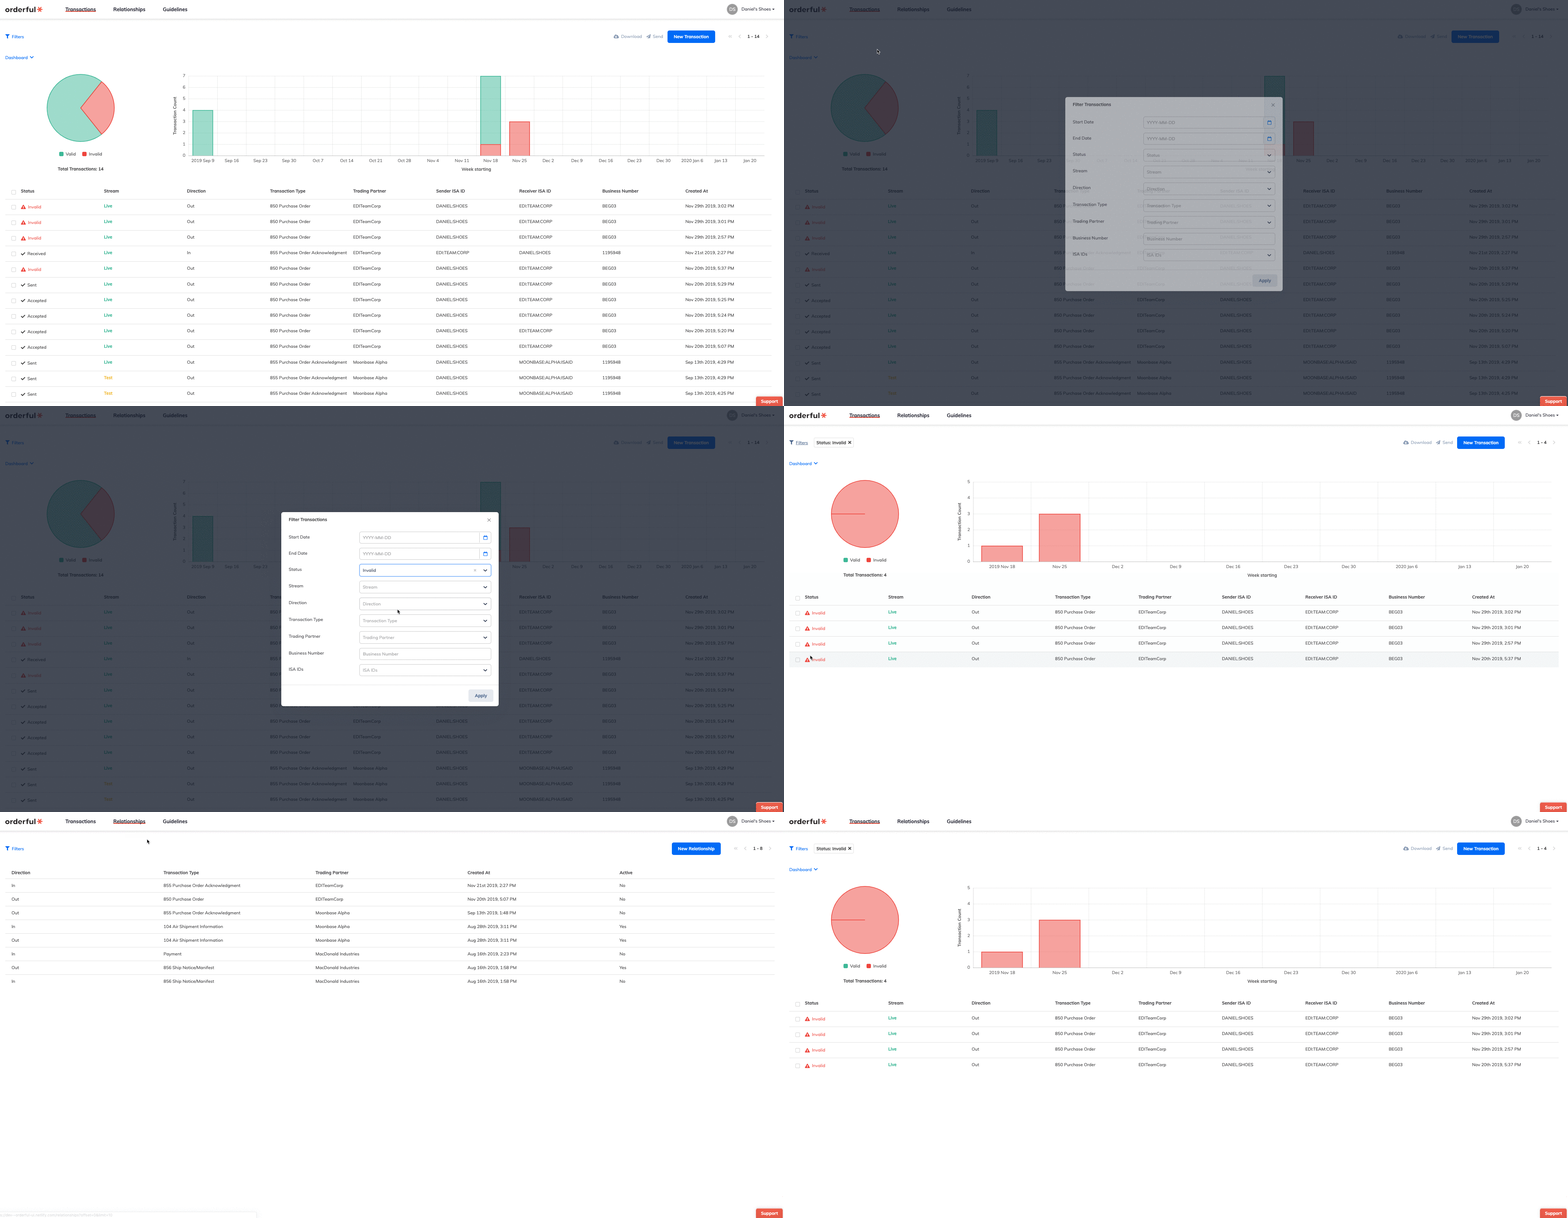
We've improved the Turnaround rule writing experience. By pulling in your reference Transaction and displaying them side-by-side with your currently selected segments, you can now visually select the paths you want matched.
In order to provide you and your system with the most accurate data, we introduced a new optional validation step to our platform. Now, you’re able to add an “inbound guideline” to your account. This guideline is then used to validate all your incoming transactions of a certain transaction type, similar to how that’s already being done to transactions you’re sending to your trading partners.
If any transaction reaches your Orderful account and it doesn’t meet your guideline for that transaction type, the transaction will be marked “Invalid” and held in your account. You can then write rules to fix that transaction and new ones of that type going forward. Once the transaction becomes “Valid”, it will be automatically posted to your system.
If you’re looking to set up such an inbound guideline, please contact us and we’ll help you through the process.
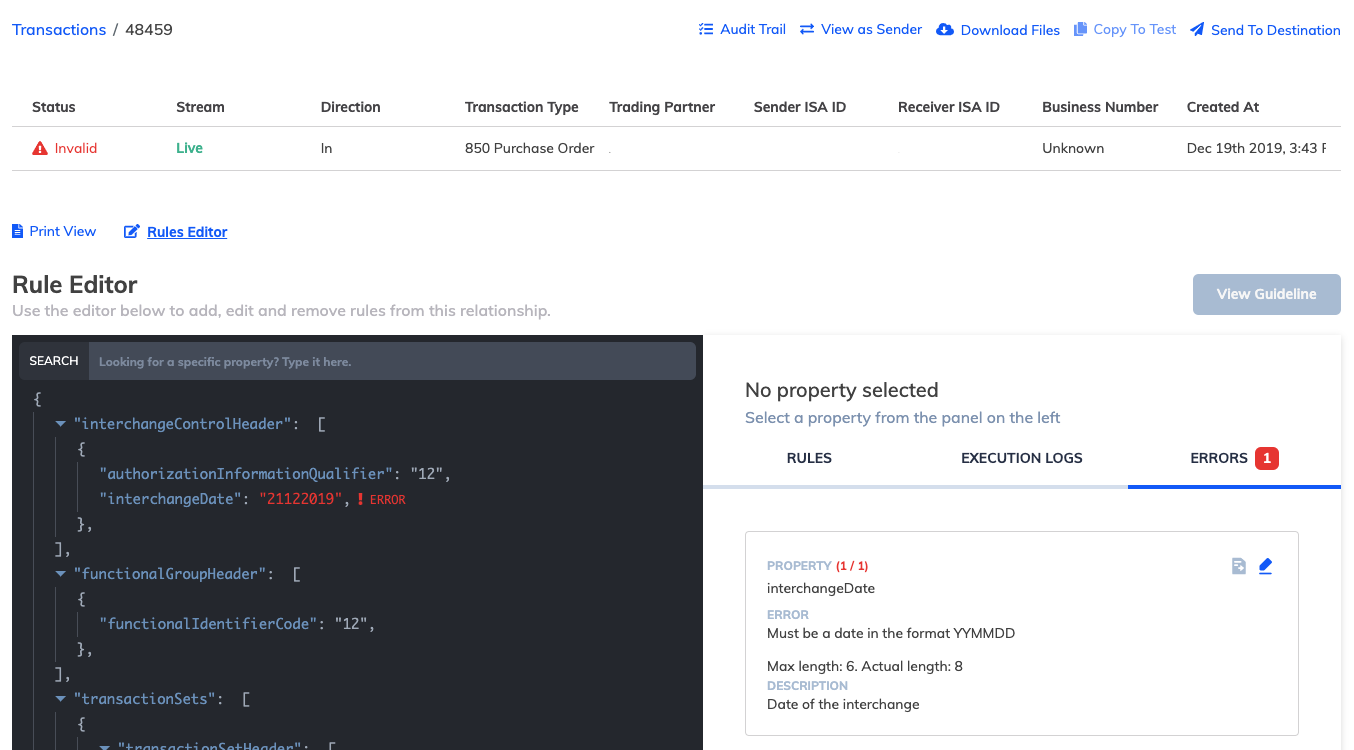
Invalid inbound transaction example