2. Set up a Trading Partnership as a Leader
A Trading Partnership is a relation between two EDI Accounts that contains at least one Relationship.
To create a new Trading Partnership as a Leader, you will need to:
- Submit or accept a Trade Request.
- Configure your Relationship
2.1 Submit a Trade Request
After setting up your organization, you will need to start a new Partnership by sending a new Trade Request.
To create a new Trade Request, you will first need the following information from your Partner:
- ISA ID
- ISA Qualifier
- Contact email
Orderful will use the ISA ID to look up whether we already have this company and its requirements in our system.
Once you have these you can create the Trade Request:
To send a new Trade Request:
- Sign in to your Orderful account:
- Orderful US: https://ui.orderful.com
- Orderful EU: https://ui-eu.orderful.com
- Click on New Trade Request and select New Trade Request.
If you want to create multiple trade request at once, you can choose the option Import from CSV.
- Fill out the form that pops up. Since you are the Leader, be sure to select My EDI Account (I am the Leader). We use the email to contact your partner, so please ensure this email goes to the best resource to complete the EDI onboarding.
- Once completed, you will be returned to the Trade Requests page where you will see your new request under "Outbound Requests" with a status of "Pending".
2.2 Initial Follower Onboarding
The email address you entered in the previous step will be used to create an Orderful Organization and user for your Trading Partner. We will also send them an email with onboarding instructions. As part of this onboarding, your Trading Partner will accept the Trade Request you sent in the previous step.
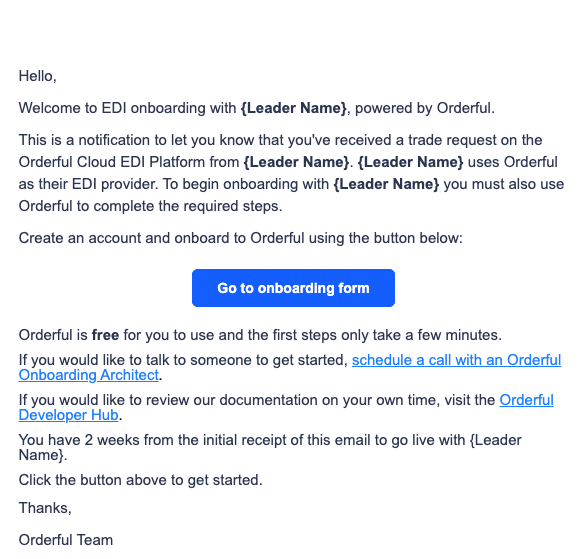
An example of the email your partner will receive.
2.3 Configure your Relationship
Now that your Trade Request has been accepted, you will have one or more new Relationships.
- From the left navigation menu, click on Relationships.
You will have one Relationship for each Transaction Type that your Leader has defined in their scenarios.
- Click on a relationship with the status "Setup".
A side panel with the relationship configuration opens on the right.
- If you'd like to see a breakdown of all the different Relationship statuses and what they mean, they are documented here: Relationship statuses
- You can configure the following settings on a relationship
- Data format: The data format of the document you will send or receive.
- JSON, X12 or EDIFACT for EDI transactions
- XML, CSV, JSON, PDF, JPEG for Any File transactions
- EDIFACT Syntax Version (EDIFACT only)
- EDIFACT Character Set (EDIFACT only)
- Version: The data version of the document you will send or receive.(e.g. 004010).
For JSON and Any File formats, you can only select version 1. - Guideline:
Not applicable or Optional as you are the follower.
Not applicable for Any File relationships. - [Inbound only] Deliver Transactions to Communication Channel: Choose one or more Communication Channels for transactions you receive in the Live and Test stream.
- You can add multiple Communication Channels if you need to deliver the transaction to multiple parties or backend systems. You can configure up to 5 Communication Channels for each stream.
- For each Communication Channel, you can configure Advanced Delivery Settings to choose delivery conditions or format the transaction being sent.
- If the type of Communication Channel you selected isn’t compatible with your Relationship data format and version, you’ll need to configure conversion options under Advanced Delivery Settings.
- If you want to receive transactions in both Test and Live streams on the same Communication Channel, you can tick the checkbox "Use selected for Test Communication Channel".
- [Inbound only] Choose your acknowledgment policy: You can either choose to:
- Auto-accept: Any transaction you receive will have an Accepted acknowlegdment status.
- Send acknowledgment: Define an acknowledgement logic outside of Orderful and send an acknowledmment.
If you chose to send acknowledgments, Orderful will expect different acknowledgement formats based on your relatiosnhip data format: 997 for X12, CONTRL for EDIFACT or JSON Acknowledgment for JSON.
- [Outbound only] Deliver acknowledgements: Check the checkbox if you want to receive acknowledgments (997 for X12 or CONTRL for EDIFACT) on one of your Communication Channel.
You can't receive JSON acknowledgments on your Communication Channels.
You can't receive acknowledgments for Any File relationships.
- [Outbound only] Deliver acknowledgments to Communication Channel: Choose one Communication Channels for acknowledgments you receive in the Live and Test stream.
This setting only appears if you checked the Deliver acknowledgments checkbox above.
- [Outbound only] Timeout Time: Define how long you want to wait for a Functional Acknowledgment from your partner before a transaction is set as "Overdue". The default is 120 minutes (2 hours).
Your partner - the follower - must also configure relationships on their side.
Let them know that the Relationship is ready for their configuration information.
Updated 4 months ago